Sunday, April 24, 2005

Dulce De Leche Brownies

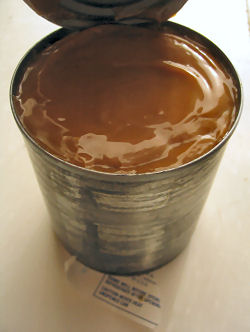
With my curiosity on Dulce De Leche piqued, I had to try making it in the microwave...I'm pleased to report that it *is* possible, but it smells funny (think scalding milk) and it is very important to make sure to use a deep steep sided bowl so that when the condensed milk is heating up and getting all frothy and bubbly, it doesn't overflow the bowl and get your microwave all messy.

Anyway, with the excess Duce De Leche around, I had to figure out what to do with it, so I used it to make Dulce De Leche filled Brownies. The recipe is adapted from Mrs. Fields Cookie Book.

Ingredients
3 ounces unsweetened chocolate
1/2 cup salted butter, softened
4 large eggs
1 1/2 cups white sugar
2 teaspoons vanilla extract
2 teaspoons instant coffee granules
2 teaspoons kahlua or other coffee liquor
1 1/2 cups all-purpose flour
Dulce De Leche, made from 1 can of sweetened condensed milk, warmed to ensure it is spreadable.

Method:
Preheat the oven to 325 degrees. Grease an 8x8 inch baking pan (or line with foil and grease that for easier removal and cleanup post baking).

In a small saucepan, melt chocolate and 1/2 cup butter over low heat, stirring constantly. Remove from heat.

Beat eggs in a large bowl on high speed until they thicken slightly. Add sugar slowly. Dissolve coffee granules in the vanilla and kahlua, then add to the egg mixture and mix well. Add the chocolate-butter mixture, and beat on medium until uniformly brown. Add the flour and blend at low speed until just combined. Do not overmix.

Pour half the brownie batter into the prepared pan. Smooth top. Bake fifteen to twenty minutes, or until the top is firm.

Spread warm Dulce De Leche evenly over the top of the baked brownie layer. Pour the remaining brownie mixture over the caramel, smoothing the top. Bake an additional twenty-five to thirty minutes or until a toothpick inserted in the center comes cleanly out of the top brownie layer.

Cool the brownies in the pan, then cut into squares (or triangles - I found these are very very rich).

Serves 16 or 32, depending on whether you slice the squares into triangles or not.

Potato Chips in What?!

Don't they look delicious? You'd never know they had potato chips in the ingredient list unless someone tells you...I've baked these cookies for cookie exchanges and have dubbed them "Mystery Ingredient* Cookies". The way it works is if ever you bake these to give away, don't tell what the Mystery Ingredient is - see if people can guess...I remember the first time I had them, I found them most delicious and quite addictive...and I had a heck of a time figuring out what the mystery ingredient was. These cookies are very tasty - light (in texture - not light in calories!), crispy and buttery good. They're something between a shortbread and a sugar cookie...

Some tips and comments before I post the recipe:

  1. I use a food processor to make crumbs of the mystery ingredient
  2. These cookies do suffer "spread" problems - I found rolling the dough into cylinders and storing in the freezer worked well - When ready to bake, I take a frozen roll out, slice it up and put the cookies in the oven with the dough still frozen. I also tend to bake for less time than called for in the recipe. The other way to get around the spread problems is to refrigerate the dough and then scoop and place on the cookie sheet as you go.
  3. Almond Extract makes for a nice variation in place of the Vanilla.

Now then. The cookies are as follows:

Mystery Ingredient* Cookies
1 pound Butter, softened to room temperature(that's right folks, we start these out right with a full pound of sweet cream butter!)
1 cup Granulated Sugar
3 cups All-Purpose Flour
2 cups crushed mystery ingredient*(worry not, it will be revealed in good time)
1 tablespoon Vanilla Extract
Powdered/Confectioner's Sugar for garnish

Method:
Cream together the butter and granulated sugar until light and fluffy. Add vanilla and stir until combined. Add flour, then crushed mystery ingredient*, mix just until combined. Shape dough into small balls and place on cookie sheet. Flatten slightly (with a fork dipped in cold water, or your palm or other mushing device of your choice - I prefer to skip this step and I also recommend chilling the dough to set it up a bit). Bake in a preheated 325-degree oven for 20 minutes (I've gone as low as 10 minutes for bake time on these cookies - be sure to keep an eye on em!). You'll want to watch them closely in the oven, as they burn easily. The cookie should just start to turn golden around the edges and the top should still be light colored when they’re finished. Allow the cookies to cool on the pan until set, and then transfer to wire racks to cool completely. When cooled, sift powdered sugar over cookies - if you want em really fancy, do your sifting over a stencil. Store in an airtight container, with layers of waxed paper or foil between layers of cookies.

Yield: Approximately 7-8 dozen small cookies

*Mystery Ingredient: give up yet? It's Potato Chips! Incidentally, to get 2 cups of crushed potato chips, it's a good portion of a large bag of chips from the store - I have been using Lay's Deli-style chips or Pringles Reduced Fat Potato Crisps for my cookies....just make sure you don't use any of the flavored varieties!

Tuesday, April 19, 2005

Sweet Sweet Milk!

What have we here? Why Dulce de Leche, of course! a most tasty caramel treat and one of my experiments over the past weekend.

My first encounter with dulce de leche occurred years and years and years ago as a sophomore in high school when I did a homestay in Uruguay - it's a food that's eaten much like peanut butter, but is even better, in my opinion! It can be eaten slathered on warm toast, sandwiched between cookies (as in the case of alfajores- delicate buttery sandwich cookies with dulce de leche for the filling) or straight from the jar...and unlike peanut butter, it makes for a fantastic ice cream topping!

Previous experiments with dulce de leche left me standing over a stove stirring, stirring, stirring the pot - to ensure that the sugars didn't burn.

This particular batch was made in a much less labor intensive manner, but left me worrying that I would have caramel exploded all over my kitchen - for this time, I opted for the "simmer the can" method....in which a sealed can of sweetened condensed milk (sans label) is simmered in a deep pot (and submerged well in the water) for about three hours (topping off the water all the while)...while it does leave for easy cleanup (provided you were good in preparing your can and removing all glue from the external surface), it did leave me a bit concerned while it was cooking.

I've since done some research and discovered that dulce de leche can be made in a conventional oven - or even in the microwave...though it will result in some cleanup of whatever dish you make it in.

Regardless of your method, the ingredient list is simple: one can of sweetened condensed milk!

For the conventional oven method, you can opt for a bain marie, or you can do without, but I personally think the waterbath method leaves more room for error in cooking time. Simply stir your can of sweetened condensed milk, then pour the contents into a pie dish. Without the bain marie: pop the pie pan full of sweetened condensed milk into a 350 degree oven and bake until caramelized to your liking. If you opt to go with the waterbath, cover the pie pan with aluminum foil, and place in a large roasting pan. Add hot water to the roasting pan so the water level comes up somewhere between half and 3/4 of the way up the side of the pie pan. (When cooking with waterbaths, I also put a dishtowel in the bottom of the dish that holds the water, so that the item that is cooking doesn't slide around when I'm trying to transfer the dishes in and out of the oven) Bake in a 425 degree oven for about an hour, stirring occasionally, or until caramelized to your liking.

For the microwave, empty the can of sweetened condensed milk into a 2 quart deep dish - like a large measuring cup or microwave safe mixing bowl. Cook on 50% power for 20-25 minutes or until thick and caramel colored, stirring every 4 minutes for the first fifteen minutes, then about every one or two minutes during the remainder of the cooking time.

As for me, the first thing I did with mine (after tasting it, of course) was slather it on a graham cracker, topped it with chocolate chips and slices of banana, then popped it into the toaster oven for a few minutes to get everything all gooey....and boy, was it tasty!

Monday, April 11, 2005

Just Wafflin'

There's something to be said for a nice warm toasty waffle in the morning, complete with fresh fruit and deep pockets waiting to be filled with pure maple syrup.

I usually use a different recipe for waffles that requires me to split my eggs in twain, beating the whites into a medium stiffness foam before folding them into the rest of the batter - I was in no mood for separating eggs, so I gave the Sour Cream Waffle Recipe from 101Cookbooks a try. Of course, I tweaked it - I figured it was plenty rich already - the recipe uses 3 whole eggs and 1/2 cup of sour cream - I only keep the full fat variety on hand. So I reduced the amount of butter down to 6 tablespoons (from 8) with no ill effect. The waffles were still extremely rich, very buttery in flavor and could probably stand to have the amount of butter further reduced. Incidentally, while I believe in full fat sour cream, I still prefer to drink and cook with skim milk. Go figure. Anyway, for those that are too lazy to click over, the tweaked recipe is below:

Sour Cream Waffles

ingredients
1 3/4 cups all-purpose flour
1 tablespoon sugar
1 tablespoon baking powder
1/2 teaspoon salt
6 tablespoons (or less) unsalted butter, melted
1 cup milk (I used skim)
1/2 cup sour cream
3 large eggs
Maple syrup, fruit, whipped cream and/or jam, mix and match as you will, for serving

Method
Heat a waffle iron according to manufacturer's directions. Lightly oil the grids. Meanwhile whisk the flour, sugar, baking powder, and salt in a large bowl to combine and make a well in the center. Whisk the melted butter, milk, sour cream, and eggs in a medium bowl until well combined and pour into the well. Whisk just until smooth; do not over mix.
Spoon about 1/4 cup of the batter into the center of the waffle iron and close. Cook until the waffle is golden brown, 3 to 4 minutes. Serve the waffles hot, with the syrup passed on the side.

Makes twelve 4-inch waffles - or if you're like me, and you have a large Belgian waffle iron (I think it's 8" across), you'll get 4 to 6 waffles out of it...

Adapted from Back to the Table: The Reunion of Food and Family by Art Smith (Hyperion, 2001)